 Representation Learning for Scene Graph Completion via Jointly Structural and Visual Embedding/Pasted_image_20250318162533.png)
Representation Learning for Scene Graph Completion via Jointly Structural and Visual Embedding
The architecture of RLSV is a three-layered hierarchical projection that projects a visual triple onto the attribute space, the relation space, and the visual space in order.
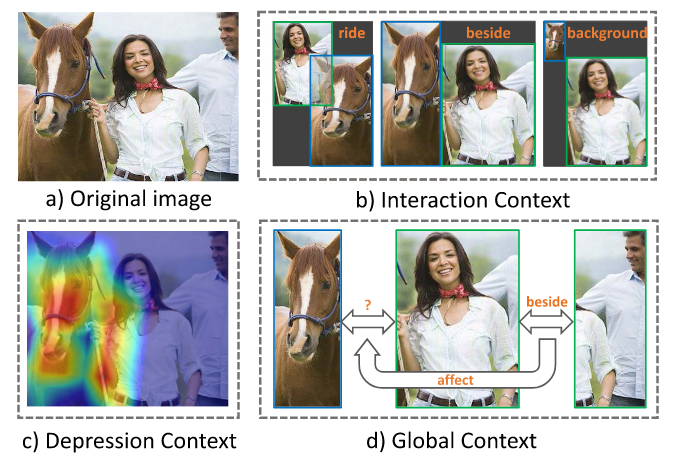
 Contextual Translation Embedding for Visual Relationship Detection and Scene Graph Generation/Pasted_image_20250318160643.png)
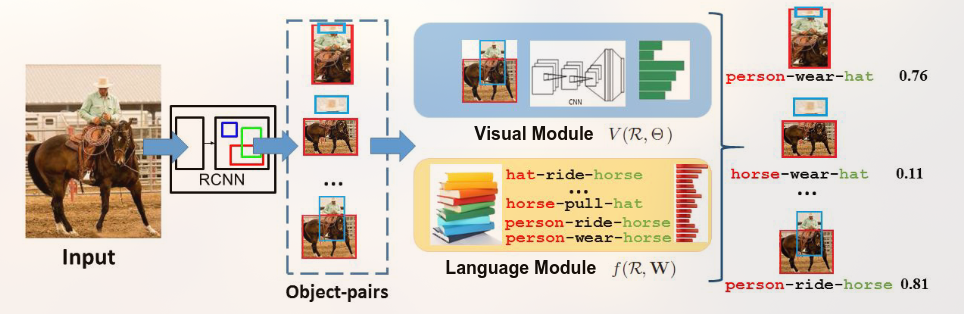
 Visual Translation Embedding Network for Visual Relation Detection/Pasted_image_20250318155431.png)
 Visual Translation Embedding Network for Visual Relation Detection/Pasted_image_20250318155444.png)

 Fully Convolutional Scene Graph Generation/Pasted_image_20250314123239.png)
 Fully Convolutional Scene Graph Generation/Pasted_image_20250317115153.png)
 Fully Convolutional Scene Graph Generation/Pasted_image_20250317115203.png)
 Fully Convolutional Scene Graph Generation/Pasted_image_20250317115216.png)
 Fully Convolutional Scene Graph Generation/Pasted_image_20250317121116.png)
 Fully Convolutional Scene Graph Generation/Pasted_image_20250317121142.png)
 Fully Convolutional Scene Graph Generation/Pasted_image_20250317121325.png)