


Feature Pyramid Networks for Object Detection
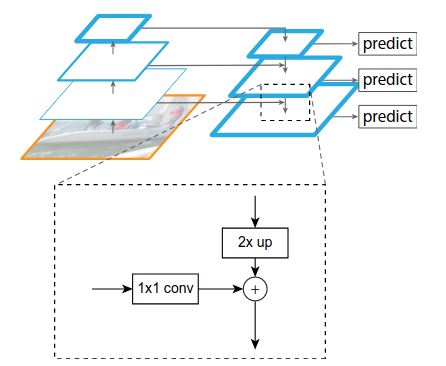
识别不同尺寸的物体是目标检测中的一个基本挑战,而特征金字塔一直是多尺度目标检测中的一个基本的组成部分,但是由于特征金字塔计算量大,会拖慢整个检测速度,所以大多数方法为了检测速度而尽可能的去避免使用特征金字塔,而是只使用高层的特征来进行预测。高层的特征虽然包含了丰富的语义信息,但是由于低分辨率,很难准确地保存物体的位置信息。与之相反,低层的特征虽然语义信息较少,但是由于分辨率高,就可以准确地包含物体位置信息。所以如果可以将低层的特征和高层的特征融合起来,就能得到一个识别和定位都准确的目标检测系统。所以本文就旨在设计出这样的一个结构来使得检测准确且快速。
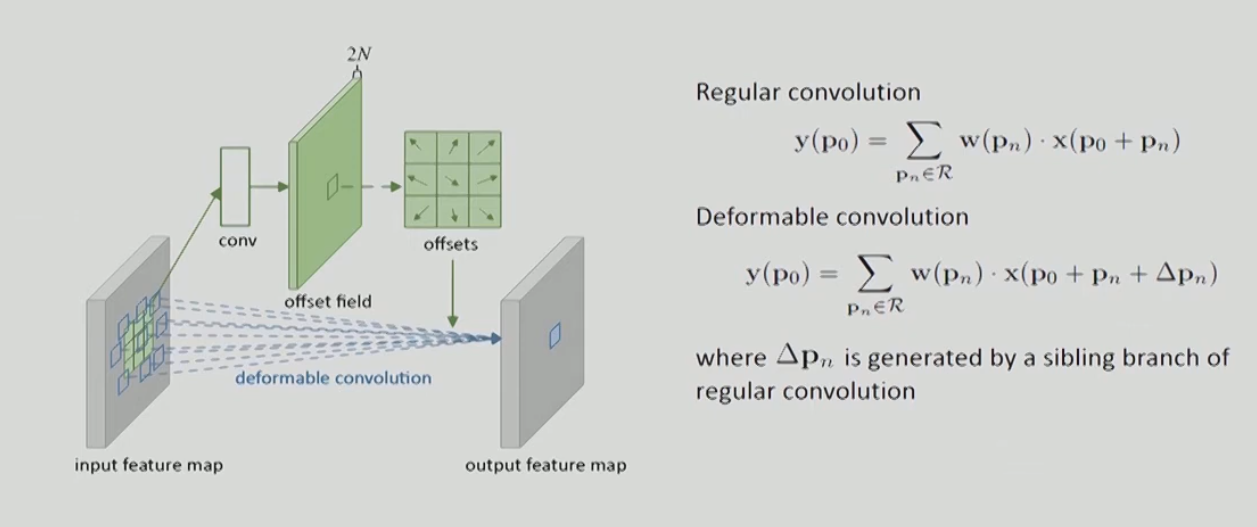
Deformable Convolutional Networks
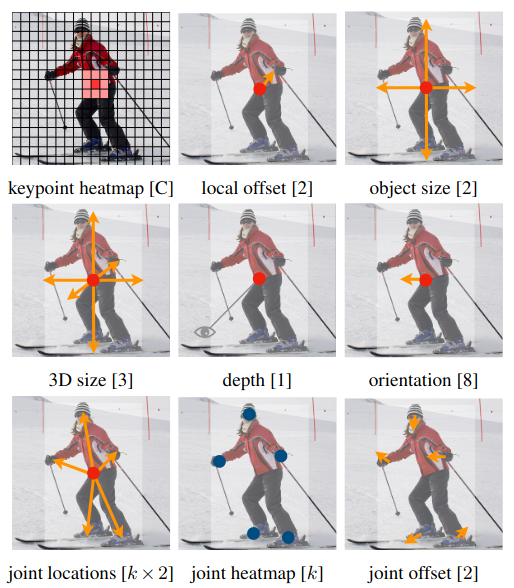
Used in [[CenterNet]]
Associative Embedding= End-to-End Learning for Joint Detection and Grouping
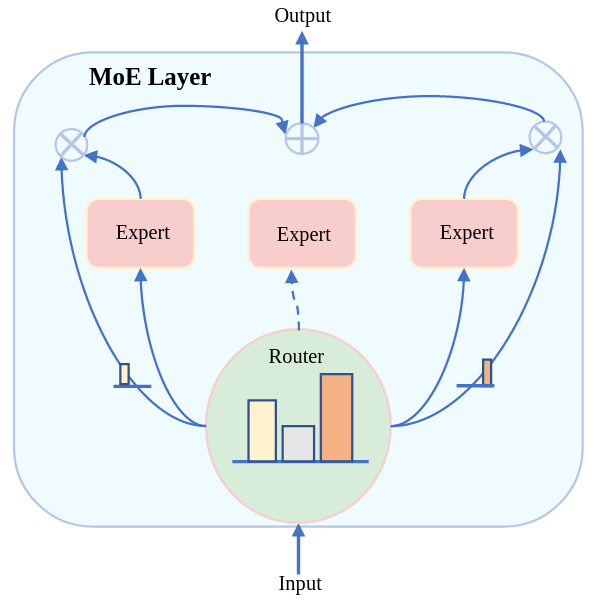
Q&A
1
What is standard dense supervised learning? Mentioned in [[CenterNet]].
Standard dense supervised learning typically refers to a supervised learning setup where:
- Standard supervised learning means:
- You have input data X and corresponding ground truth labels Y.
- The goal is to train a model $f_\theta(X)$ that maps inputs to outputs by minimizing a loss function (e.g., cross-entropy, MSE) between the predicted labels and ground truth.
- The training dataset is fully labeled (i.e., each input has a corresponding label).
- Dense refers to:
- A per-pixel or per-element prediction task, where every element in the input gets a corresponding label.
- Common in vision tasks like:
- Semantic segmentation (each pixel is labeled with a class).
- Depth estimation (each pixel has a depth value).
- Optical flow (each pixel has a motion vector).
- Surface normal estimation (each pixel has a 3D orientation vector).
In contrast to sparse supervision, where only a subset of the input (e.g., bounding boxes, keypoints) is labeled, dense supervision provides full annotations for every relevant part of the input.
Example
In semantic segmentation:
- Input: an RGB image (e.g., 512×512 pixels).
- Output: a label map of the same size (512×512), where each pixel has a class label like “road”, “car”, “sky”, etc.
- Model: often a Fully Convolutional Network (FCN) or encoder-decoder like U-Net or DeepLab.
- Loss: usually pixel-wise cross-entropy.
Instant Neural Graphics Primitives with a Multiresolution Hash Encoding
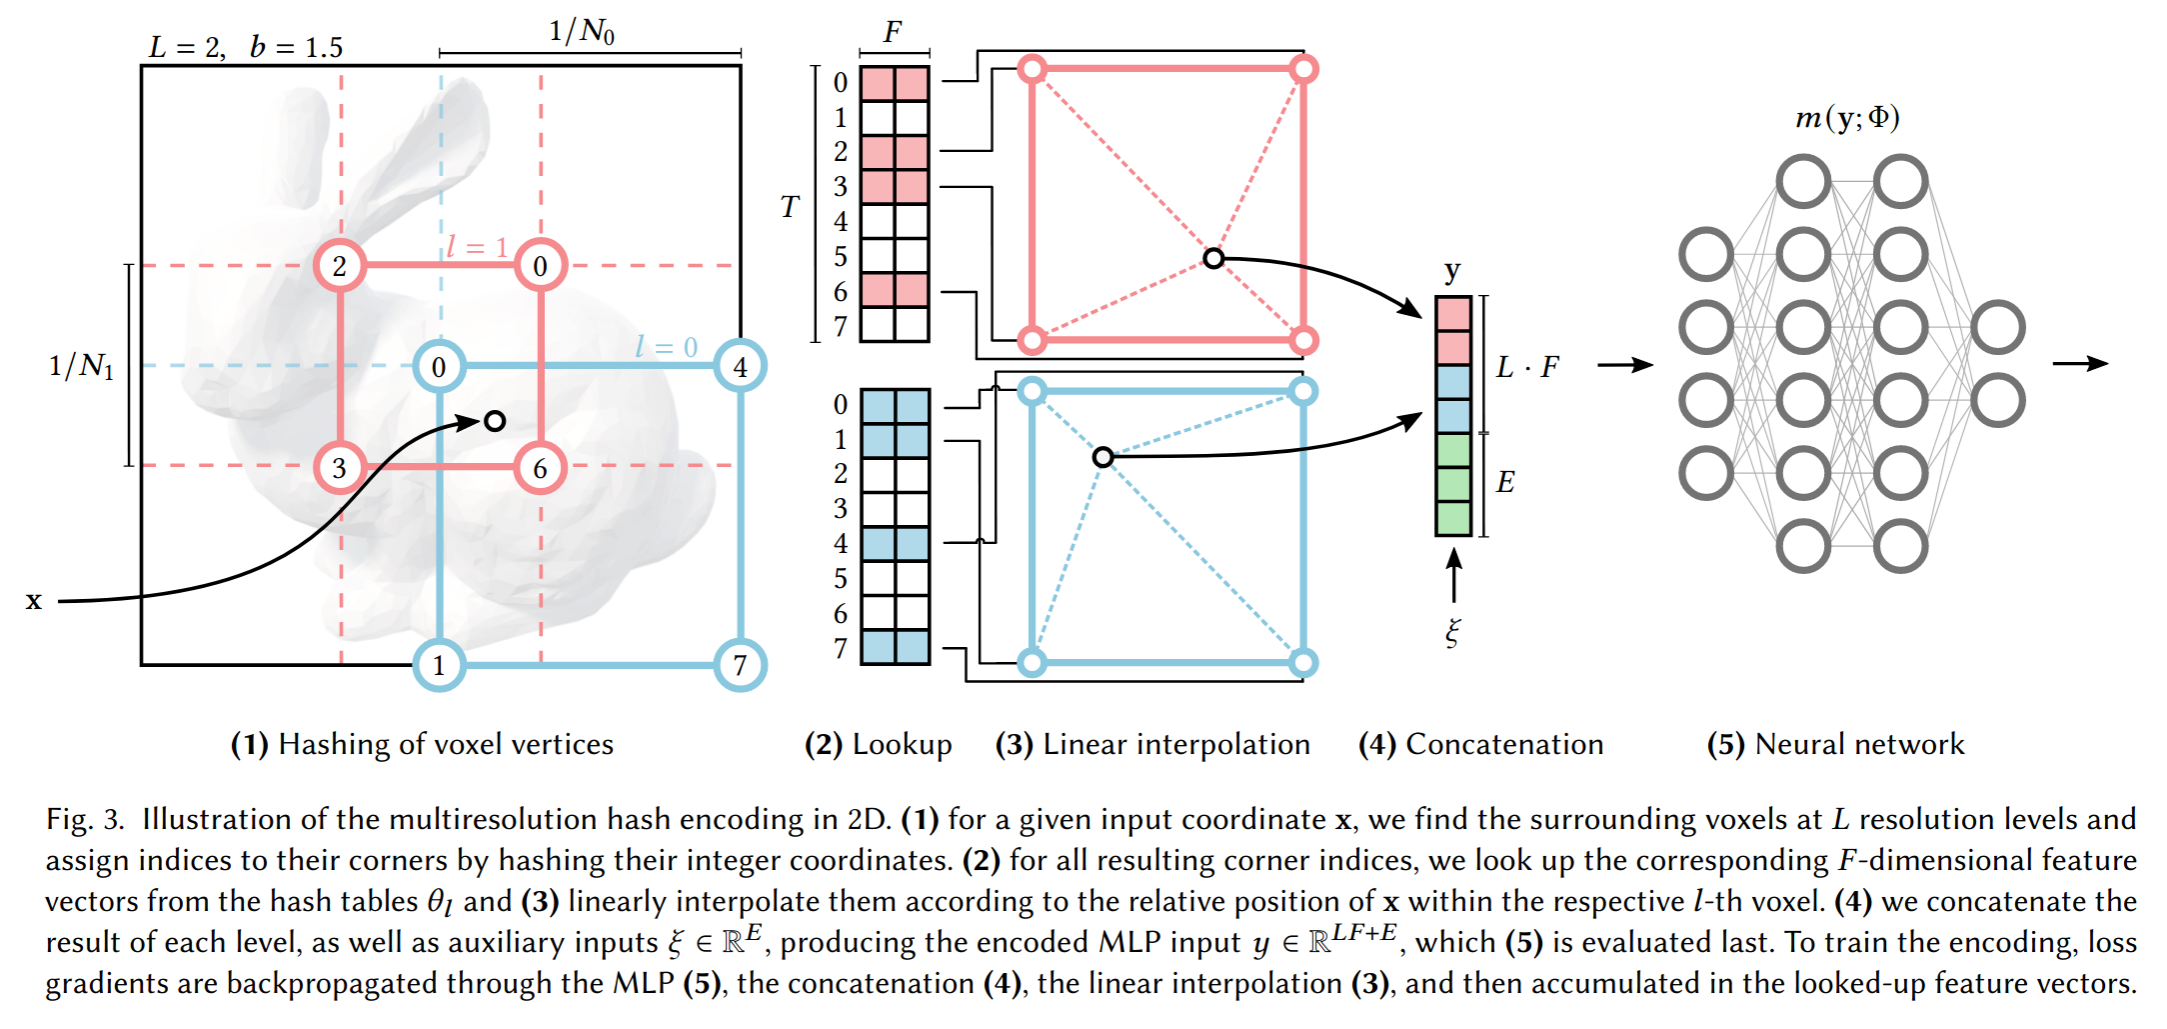
很重要的编码优化论文,MHE的概念:
Representation Learning for Scene Graph Completion via Jointly Structural and Visual Embedding
 Representation Learning for Scene Graph Completion via Jointly Structural and Visual Embedding/Pasted_image_20250318162533.png)
The architecture of RLSV is a three-layered hierarchical projection that projects a visual triple onto the attribute space, the relation space, and the visual space in order.