
Standard Toolchain Setup
Guide: https://docs.espressif.com/projects/esp-idf/en/stable/esp32/get-started/linux-macos-setup.html#
ESP_IDF
I directly download the archive with all the submodules included: https://github.com/espressif/esp-idf/releases/tag/v5.3.1
This archive can also be downloaded from Espressif’s download server: https://dl.espressif.com/github_assets/espressif/esp-idf/releases/download/v5.3.1/esp-idf-v5.3.1.zip
cd into the unzip folder (The installation will fail in conda venv)
1 | conda deactivate |
In ~/.zshrc
1 | alias get_idf='. $HOME/esp/esp-idf-v5.3.1/export.sh' |
Then each time I need to setup esp32 development environment, I only need to type get_idf.
Some useful commands
1 | idf.py set-target esp32 |
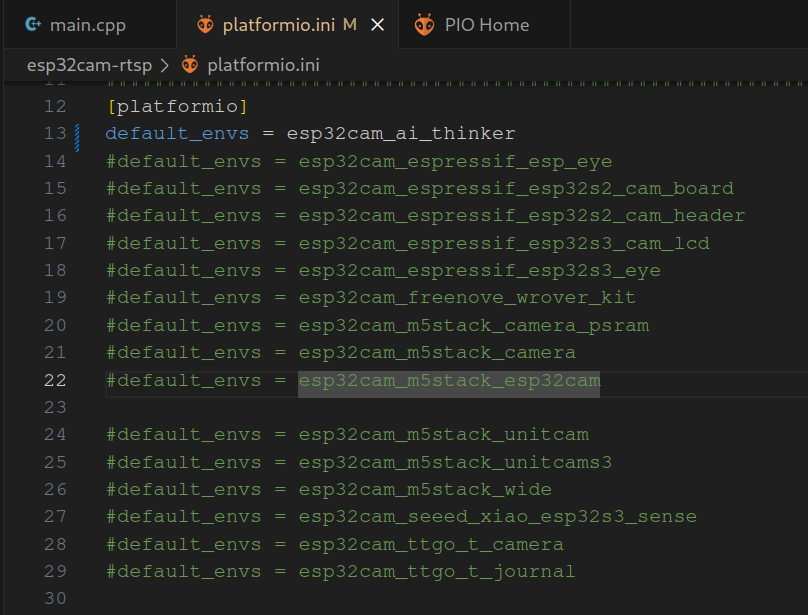
PlatformIO
事实证明pio是最方便的。。
事前安装过pio的vscode插件,直接打开pio的esp32项目就直接可以编译上传以及查看串口监视器。

一款线上还在更新中的shader教学,有可交互代码,爆赞
https://thebookofshaders.com/
一些dalao写的shader:
https://www.shadertoy.com/
Shader Tutorials by Ronja
https://www.ronja-tutorials.com/
https://github.com/ronja-tutorials/ShaderTutorials?tab=readme-ov-file
Shader Tutorial For Beginner
https://github.com/Xibanya/ShaderTutorials

因为oh-my-live2d官网崩了,所以需要自己私有托管一下live2d服务才能让博客网上的小埋复活。(bonus:可以借此尝试自己制作一个live2d形象)
更于9/25,拖着很久没搞,然后官网自己复活了,好好好,直接快进到customized live2d。

因为之前使用gitalk评论系统在国内用不了了,所以尝试更换为一些国内可用的方案。其中一个是国内开发者开发@imaegoo搭建的Twikoo系统
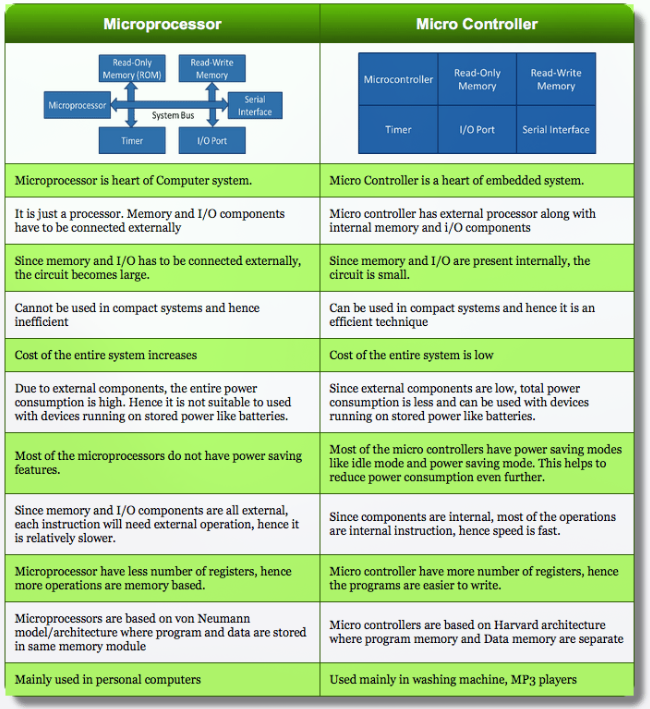
Take a look at the differences between Microprocessor (in our personal computer or phone) and Microcontroller
以下为项目布局示意图
程序接口定义
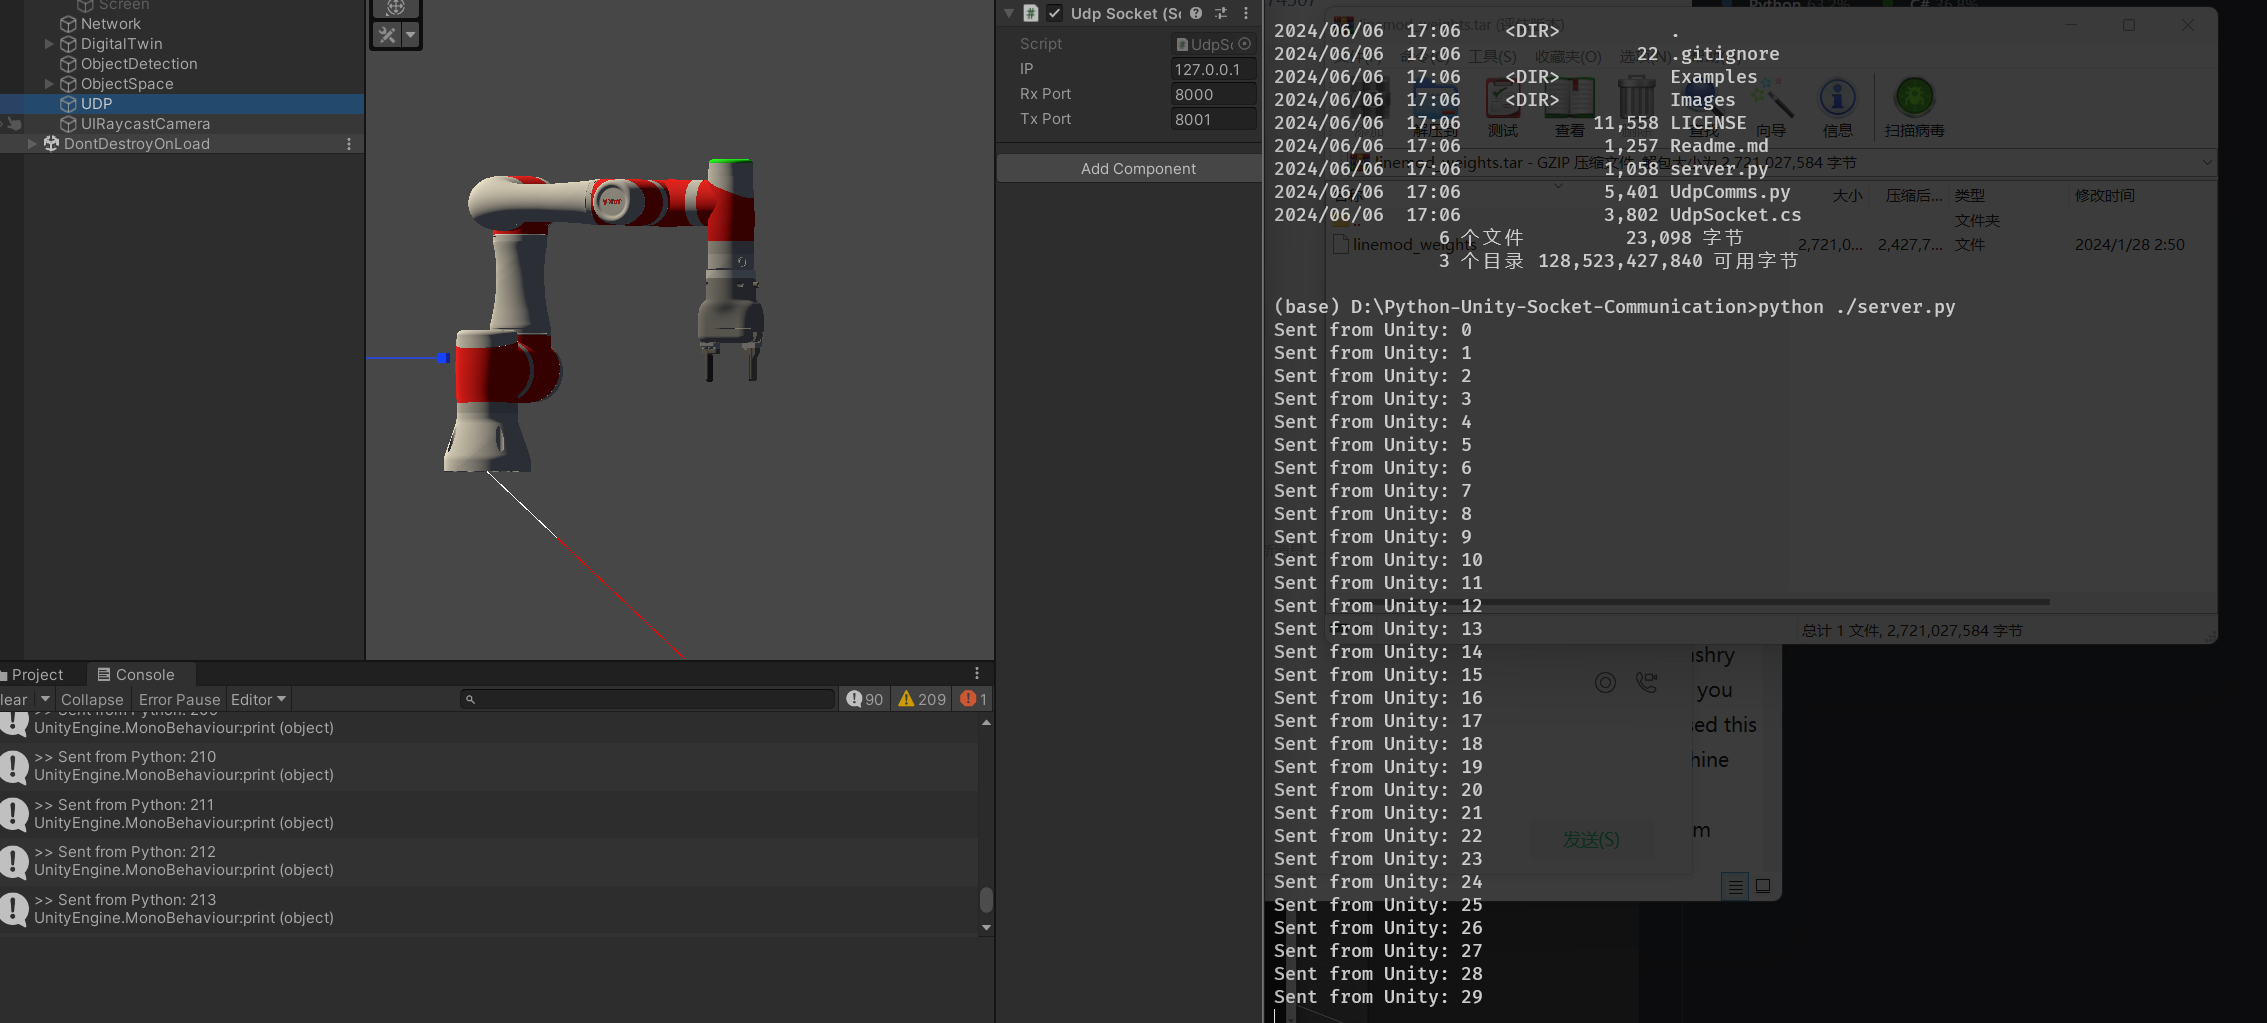
Python->Unity
代码仓库:
https://github.com/Chen-Yulin/Unity-Python-UDP-Communication
传输的数据为字符串:
1 | def SendData(self, strToSend): |
物体识别信息
需要包含的信息:物体种类,物体的三轴方位,三轴旋转,三轴尺寸。
格式:
1 | {Object Detection} |
示例:
1 | {Object Detection} |
机械臂实时角度
需要包含的信息:6 个 joint 角度(单位为度)
格式:
1 | {Current Joint} |
Unity->Python
机械臂需要旋转的角度
需要包含的信息:6 个 joint 角度(单位为度)
格式:
1 | {Target Joint} |